
Rebuilding our raised garden beds

Hey Tasmania, did you know it’s spring? We checked one major outdoor project off the list: rebuilding the veggie garden beds! So exciting. My blog may or may not become GARDEN MANIA over the next few weeks, so yeah, bear with me. (Sorry, northern hemisphere friends and family. Drink a pumpkin beer for me.)

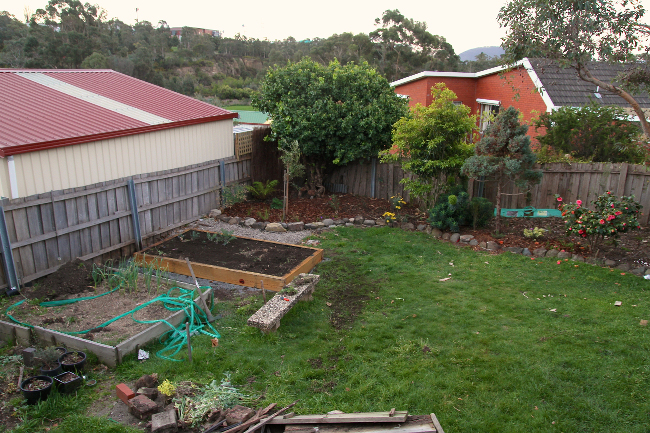
These were the beds that came with our property, and I’m genuinely thankful that the previous owners had them in place. They were fond of their veggie patch, and the beds worked well for our first-year experiments in veggie gardening. We love the beds! We just wanted to fix them up. So we did.

The planning came together in July. We wanted to keep the three beds — two for veggies, one for herbs and edible perennials — but shift the boundaries. I wanted them to be shorter in width, so that my stumpy arms can reach the middle of each one, and at least 18 inches away from the fence to keep the space clear.
Jamie drew a to-scale diagram of the proposed beds and marked their placement outside with stakes so that we could see where they’d actually go. It looked good to us, so we put in an order for timber and planned to get our beds ready this spring.
Another term I learned: they’re not railroad ties in Australia, they’re sleepers. We ordered twelve hardwood sleepers from a sawmill, 75mm x 200mm x 2.4m each (about 3” x 8” x 8’). They looked (and felt!) colossal until they were in place. Those suckers are heavy.

With the previous edging gone, we had ourselves a big dirt pile that needed someplace to go. Time todig in.
Here’s the materials list for our beds; this list applies to each 4′ x 8′ bed.
- Three hardwood sleepers, aka railroad ties — 75mm x 200mm x 2.6m (3” x 8” x 9’)
- All-purpose gravel — ⅓ cubic metre was more than enough for three
- Enough soil and compost
- Garden tools: mattock, sledgehammer, wheelbarrow spade and shovel
- Circular saw
- Drill, hex bit and 125mm (5”) galvanised batten screws
- 1 litre decking oil (1 qt) and brush
- Plastic flashing — I used a 300mm x 30m roll of Plascourse flashing
- Staple gun
- Level
- Square edge, pen, tape measure
- Another set of hands — sleepers are heavy!

And here’s the rough list of steps we carried out in assembling the beds:
- Digging. Lots of moving soil around. We dug out excess sections of turf (to keep grass out of the beds) and shallow trenches where the new beds would go.
- Trenching. To ensure drainage under the hardwood, Jamie filled the trenches with a 50mm layer of fine bluestone gravel. The gravel also made it easier to tamp the sleepers level with a sledgehammer.
- Oiling. We want our hardwood sleepers to last, so I applied a coat of decking oil to each of them. We had half a tin of ‘natural’ tint in the shed, so I used that, though I may go for a darker stain in the future. (Currently debating between black, merbau, and letting them gray out.)
- Sawing. All the sleepers needed to be cut to size. The beds ended up being 2580 L x 1400 W.
- Flashing. I stapled a layer of thin plastic Plascourse flashing to the inner walls of the sleepers. Again, this is another moisture barrier that will hopefully prolong the life of our hardwood sleepers. It might be total overkill, but hey why not give it a go.
- Attaching. Once the sleepers were in place and fully level, we attached them at the corners with 125mm galvanised batten screws. The sleepers are thick enough that they don’t need support posts.

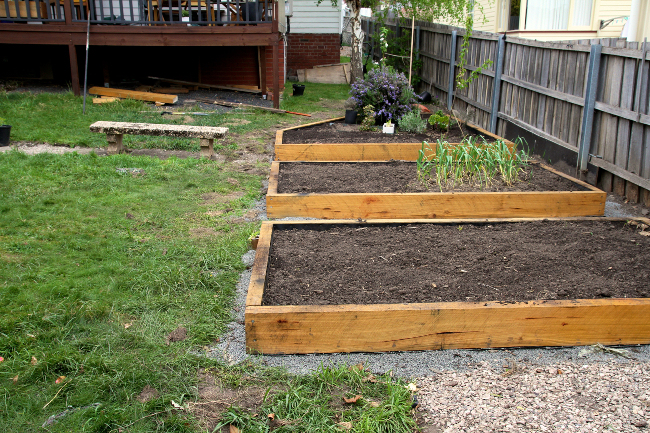
So that was the first bed. We came back for the others over the next two weekends.

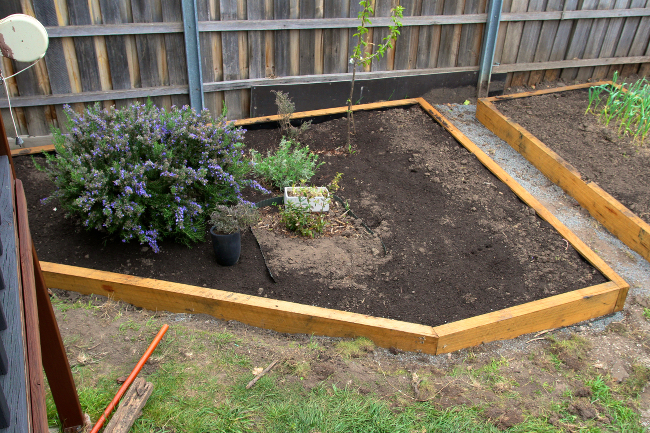
The second bed was identical to the first, but you can see that the herb bed took a different shape, mostly due to the well-established rosemary. (It’s still purple, look at it!) The diagonal piece of timber allows for a wider walkway past the deck than the previous edging did, and the sheer size allows for lots of herbs. We shifted a few plants around in here, including the dwarf cherry tree that we’d planted in front of the deck last year.

This bed was a little trickier to assemble than the other two. With the long length along the back, we had to join two pieces of timber horizontally. A connector plate, or, a piece of galvanised metal with a bunch of nails hammered in it, did the job.
For making the mitred cuts on the diagonal, Jamie got out a pen and paper and did a little trigonometry to figure out the angles. Bless him, I would have just used a measuring tool.
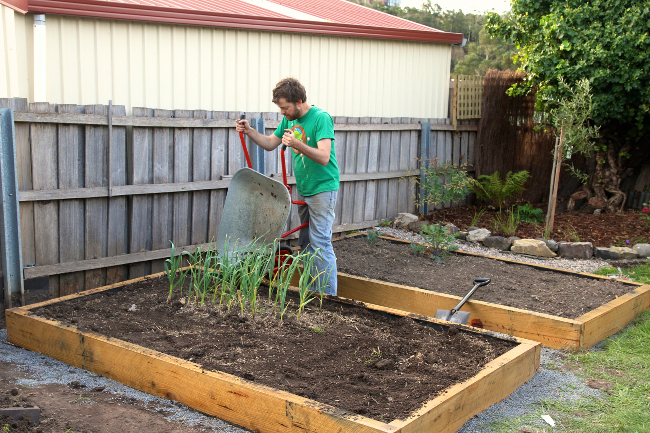
After the beds were built, we spread out the dirt-piles within each one, top-dressed them all with fresh compost and blood and bone and raked them in. Never buying bags of compost ever again, by the way. Getting it by the ute-load is so much more cost-effective.
(Those green sprigs in this bed are our garlics. I’m not sure when they’ll be ready for harvest, November or December, but I hear garlic will let you know when it’s ready to come out? Good, I’ve never harvested it.)

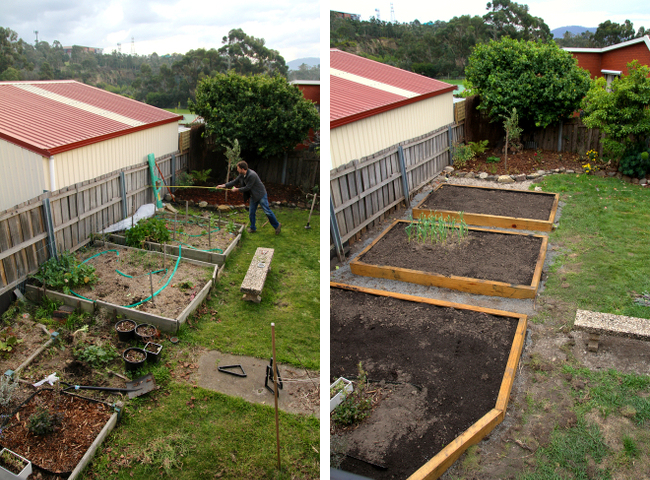
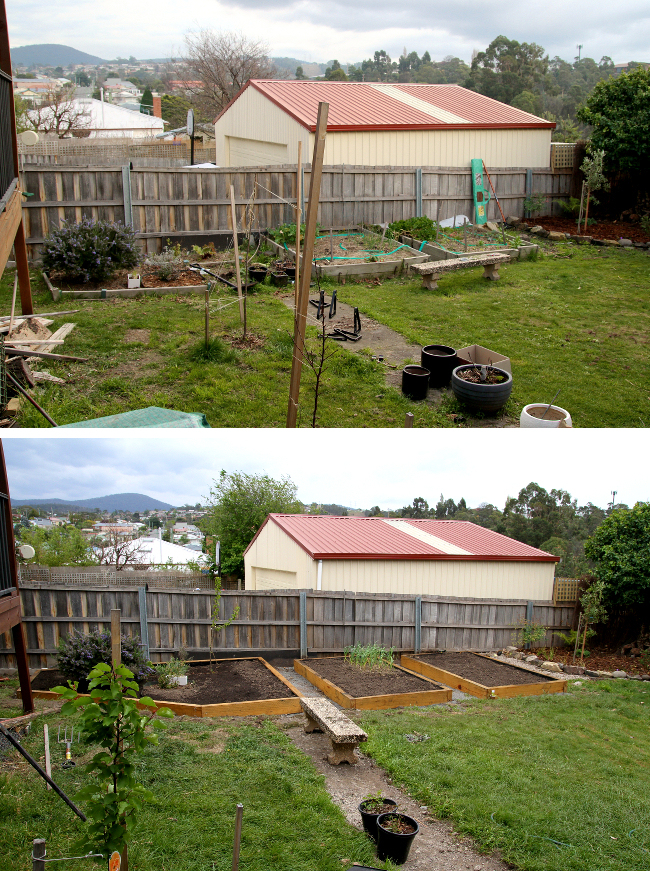
Time for the juicy before-and-after shots.
As much as I’m bothered by the proliferation of picture-perfect “Before + Afters” and endless images of perfection that don’t reflect reality, no thanks to other blogs and Pinterest and such, I like looking through my own pictures of the stages of progress I’ve made. So yeah. You’ll have to forgive me.


I’m amazed by how, well, landscaped it all looks now. I still need to add more gravel and some edging to finish things off and make it all mower-friendly, but between the rebuilt garden beds and cleaning up the corner of sadness, things are certainly improving.
The beds are slightly staggered in elevation, as they all sit on a faint slope. It was worth the time and attention given to making sure they were level.
You see that little concrete bench? We planned to load it onto the ute and bring it down to Jamie’s dad’s, but then we found out that we could barely lift the thing two inches off the ground. Welp. So it stays, for now.
Article Source: Rebuilding our raised garden beds